How to quickly and easily create a drop-down list in Excel?

For your business or your home, it is appropriate to be organized. And if tons of applications exist to help you do this, the traditional Microsoft Excel still does the trick.
Excel is not just a software created by Microsoft from another time, which your parents used at the time to manage their expenses. If you know how to use it effectively, it can become a valuable ally, whether you want to manage the schedule or the finances of your company, your association or your home. And as “time is money”, let’s see how to simplify data entry in Excel using the drop-down lists.
To be able to take advantage of Excel and its drop-down lists, you will need a license or a subscription to the Microsoft 365 suite. Whether you use the web or desktop application, the process is the same. If you use a similar software from another publisher – for example Google Sheets – you will be able to find the same features. Nevertheless, the way of doing this may be different.
1. Select the cells where you want to insert a drop-down list
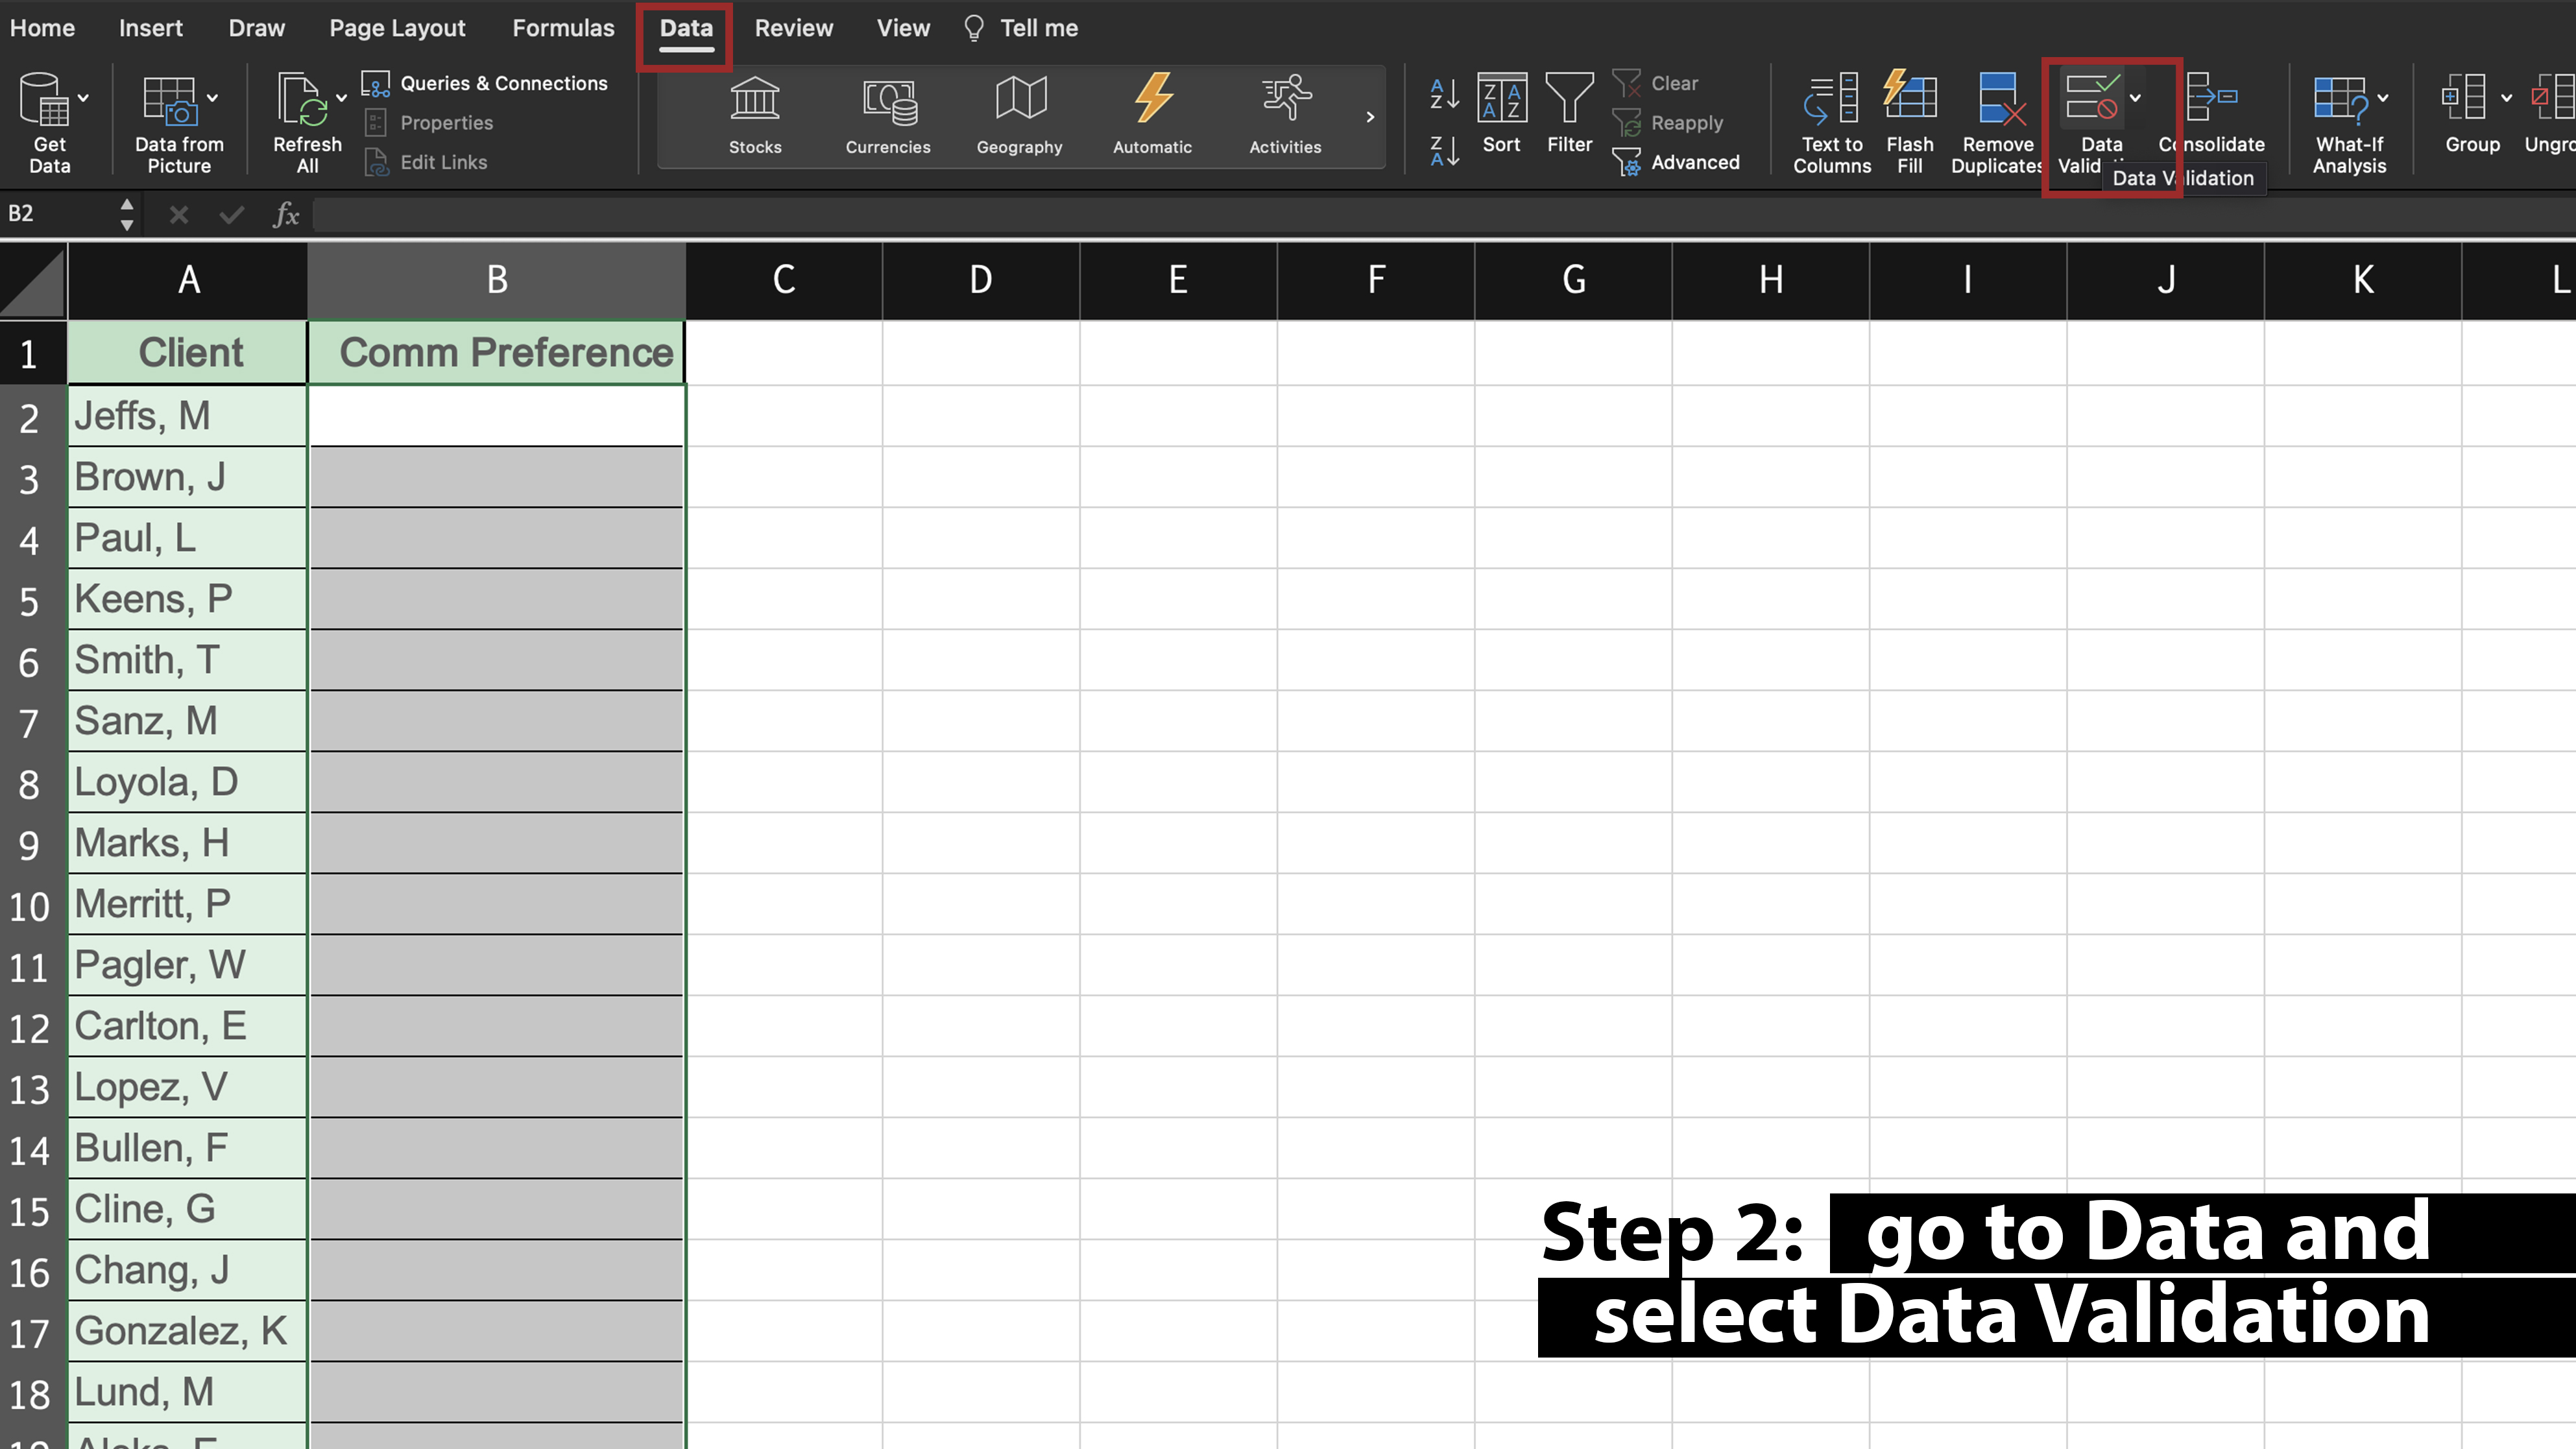
This example spreadsheet has a list of customers on the left and a column with their corresponding communication preference on the right.
To simplify the maintenance of this list, its owner wants to add a drop–down list in the right column, which indicates communication preferences – e-mail, call or SMS.

Screenshot by Maria Diaz/ZDNET.
2. Click on Data validation
Go to Data > Data validation to display the pop-up window.
Screenshot by Maria Diaz/ZDNET.
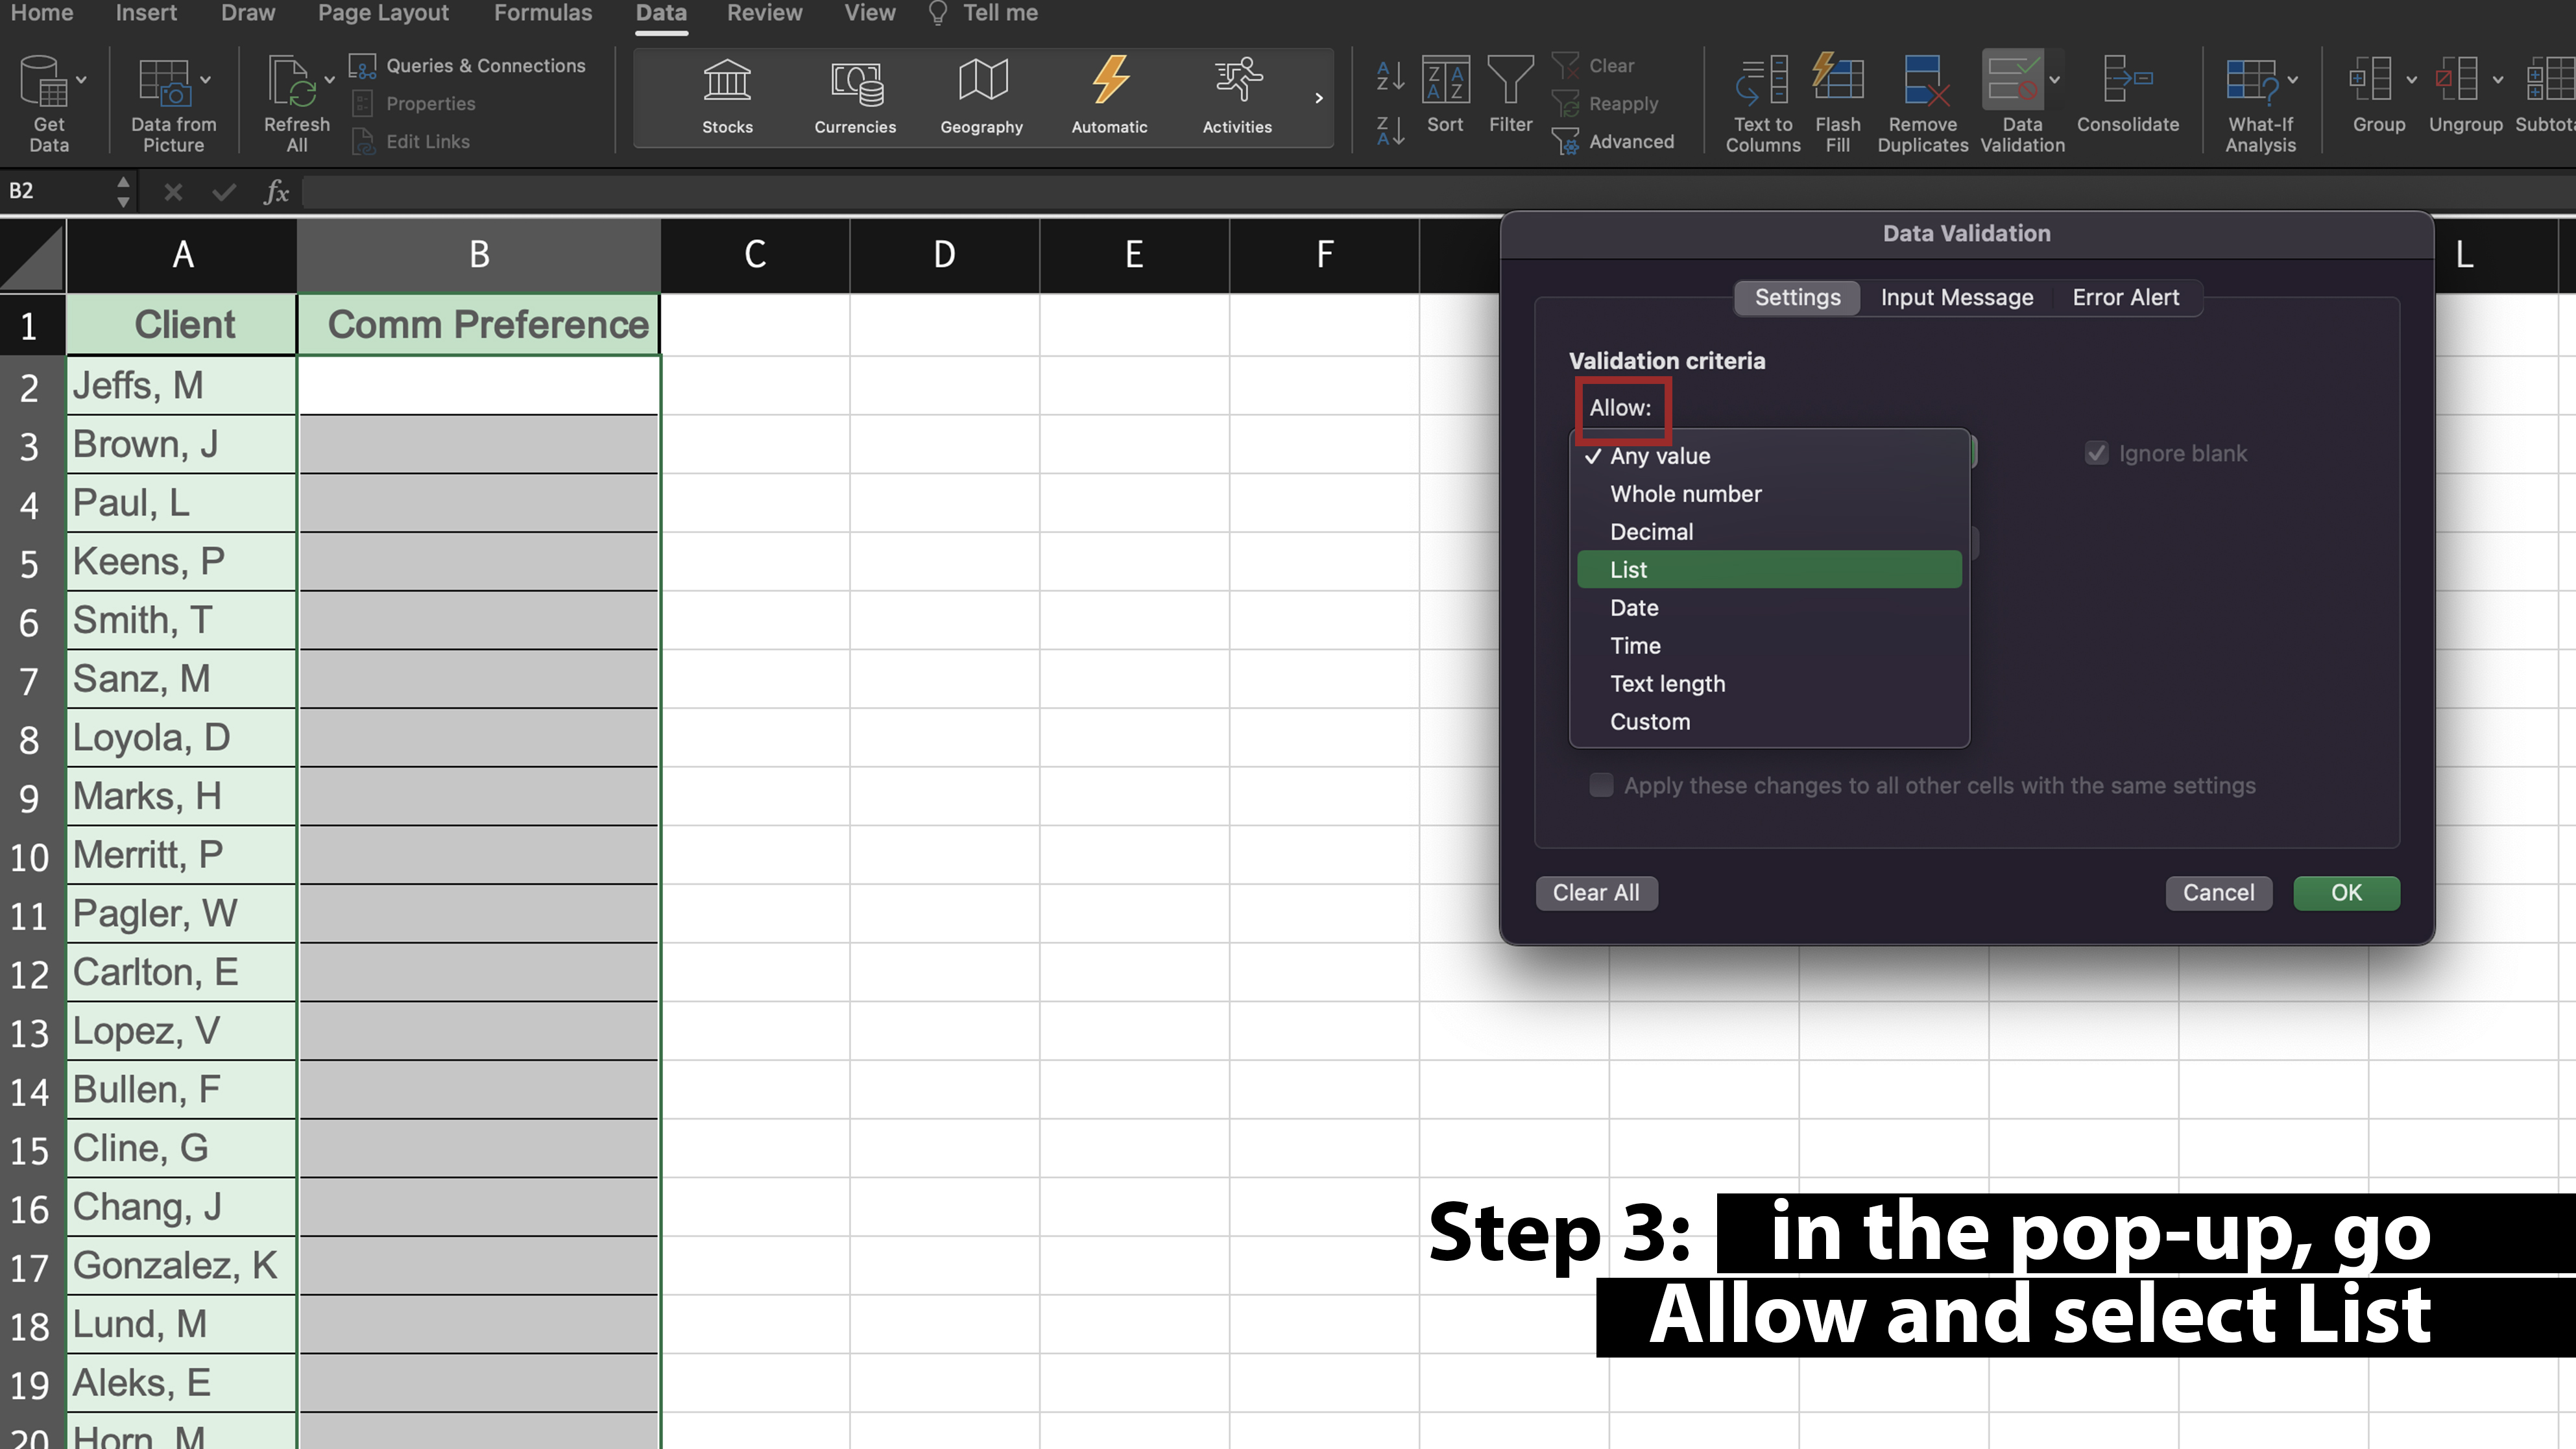
3. Add a drop-down list
In the window Data validation, browse the drop-down menu Allow and select List.
Screenshot by Maria Diaz/ZDNET.
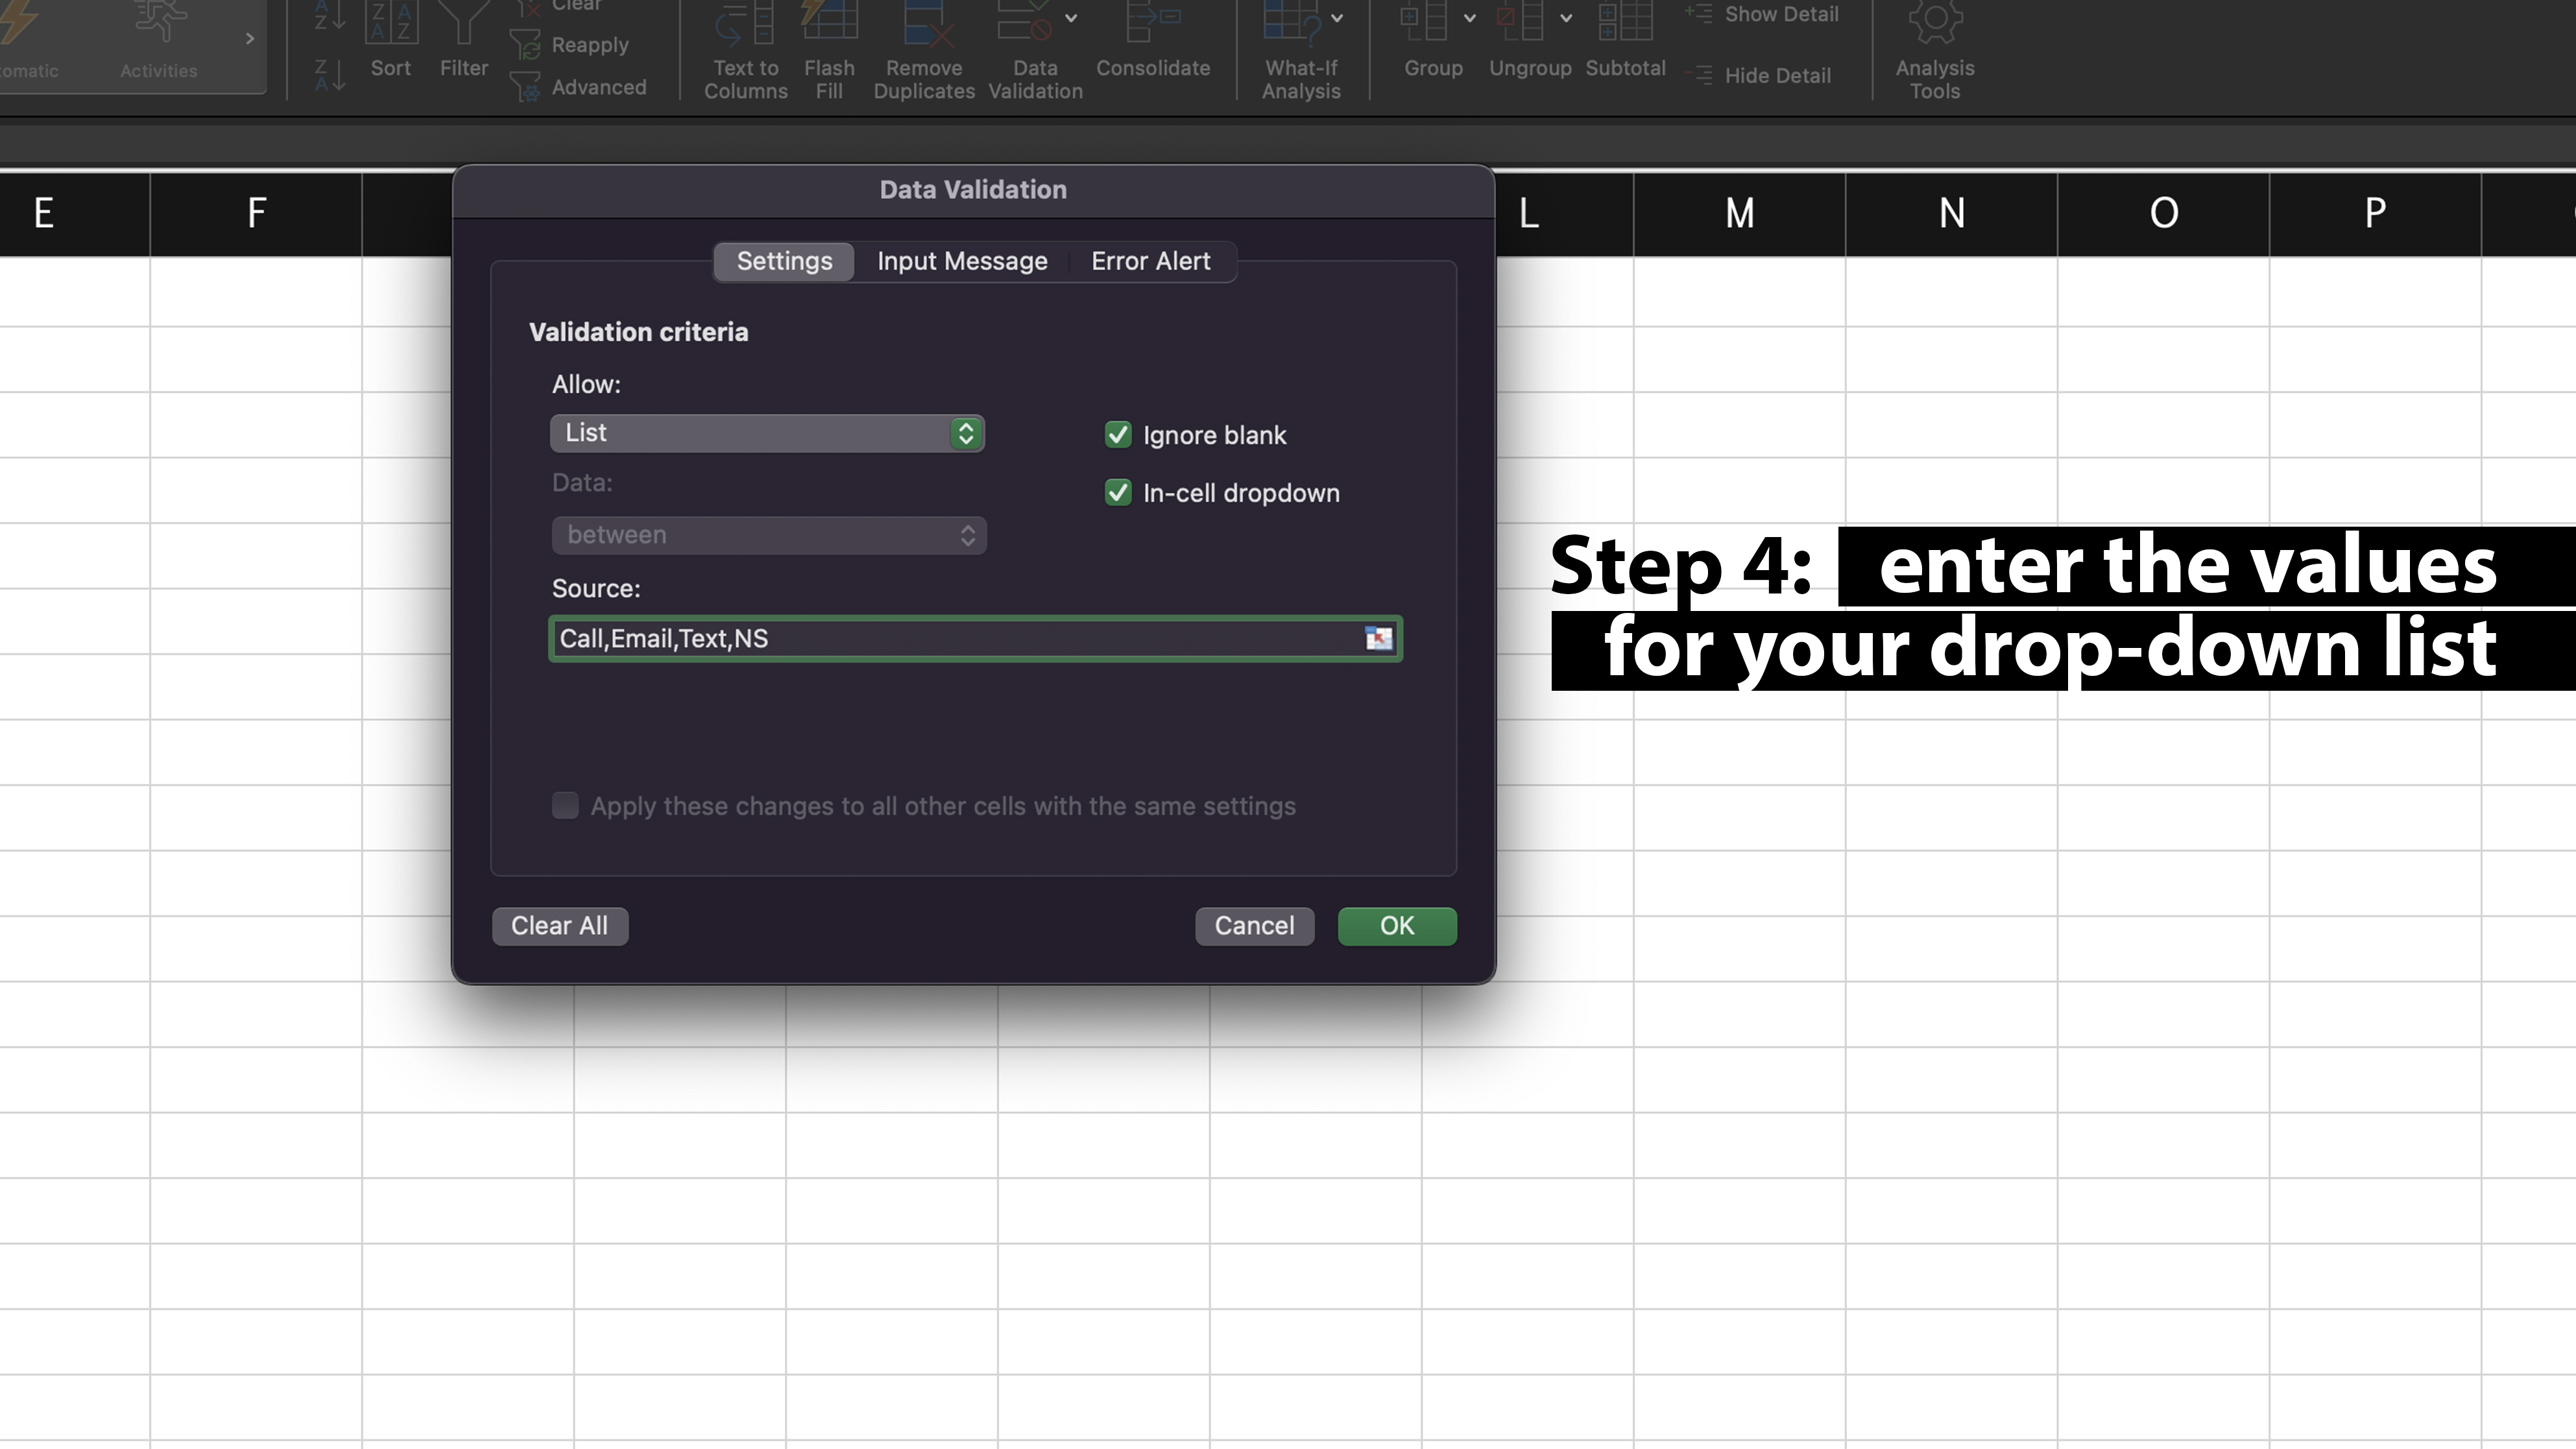
4. Enter the values from your drop-down list
In the field Source, enter the items that you want to appear in your drop-down list, separating each of them with a comma.
For this example, I have entered “Call” (call), “Email”, “Text” (SMS) and “NS” (not indicated).
Screenshot by Maria Diaz/ZDNET.
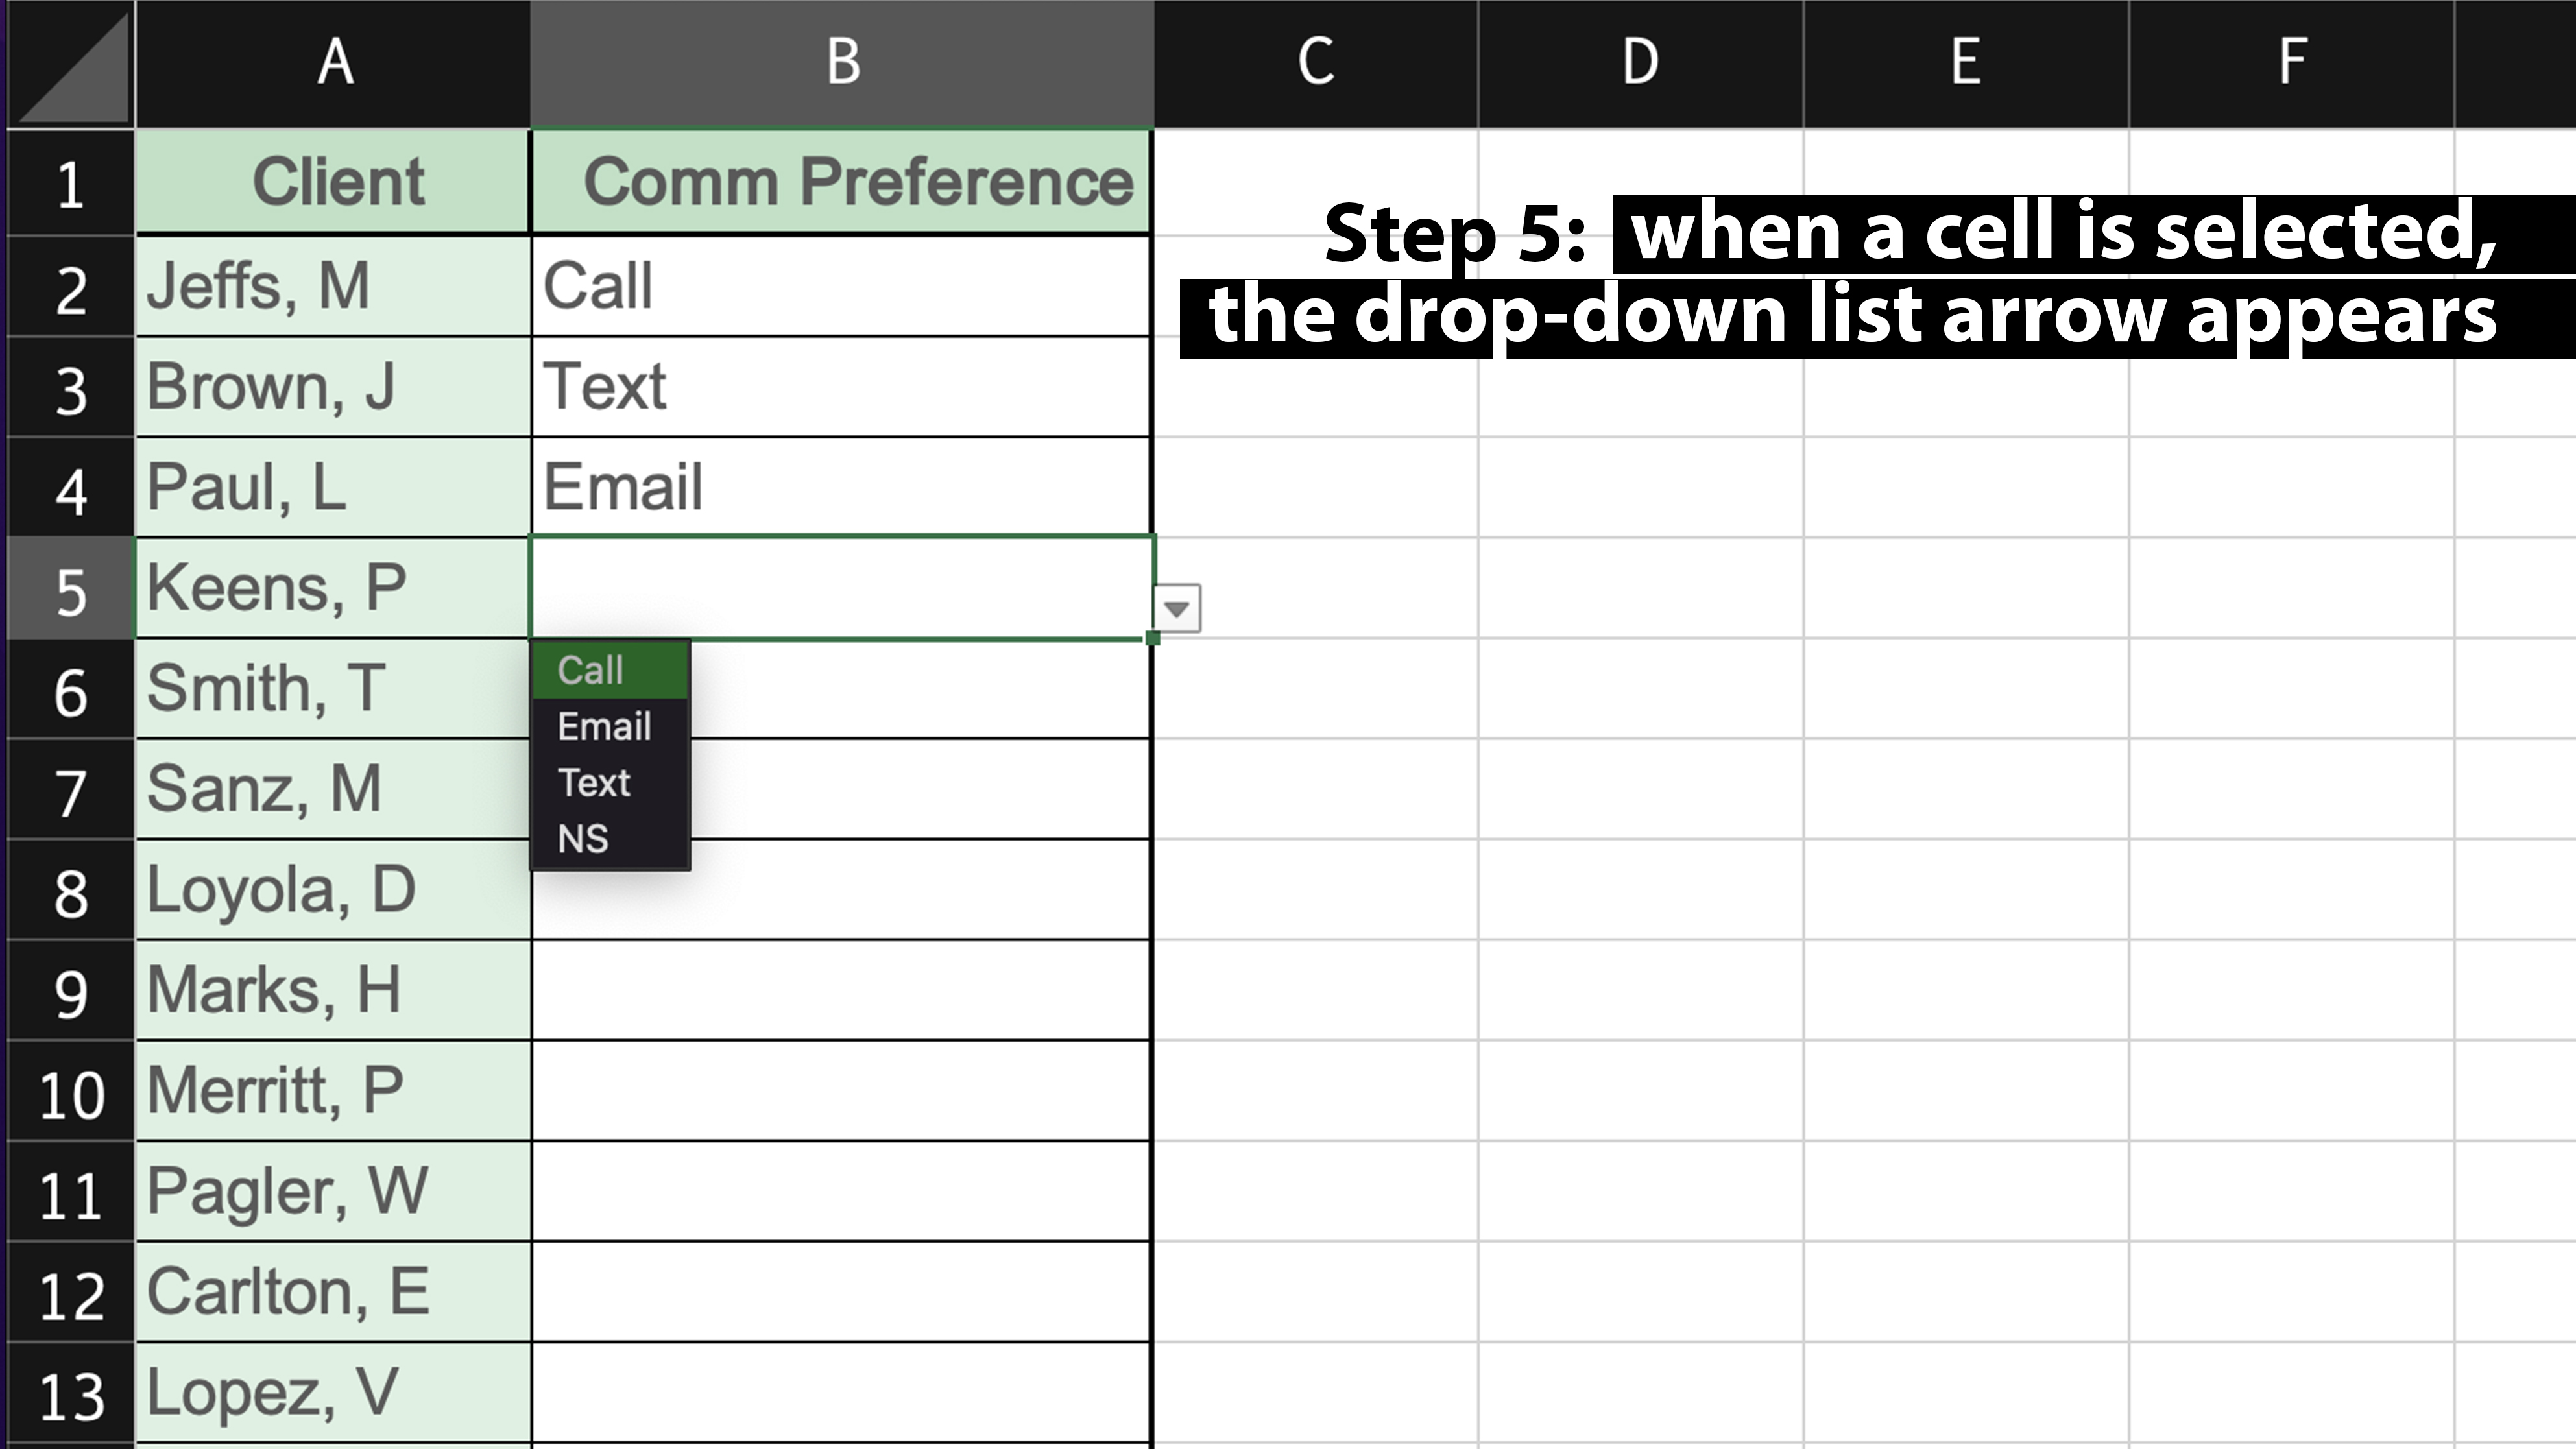
5. Save your drop-down list
Click on OK to save your drop-down lists in your spreadsheet program. You can immediately use the lists that you have created.
Now, when you click on one of the cells concerned, an arrow appears in its lower right corner. When you click on the arrow, the drop-down list appears and offers you the different options that you have chosen. When you select an item from the list, it is displayed in the cell in question.
Screenshot by Maria Diaz/ZDNET.
How to create a yes/no drop-down list in Excel?
To create a drop-down list offering the answers “yes” and “no” in Excel, follow the same process :
- select the cells that should accommodate the drop-down list ;
- go to Data > Data validation ;
- enter “Yes, No” in the field Source from the pop-up window ;
- click on OK to save your drop-down list.
Do I need a formula to create drop-down lists?
No formula is needed to create drop-down lists in Excel. All you have to do is change the way the data is added to the cell, from entering text to selecting from your list, by going to Data validation in the toolbar.
Are creating a drop-down list and filtering data the same thing?
Although they are often confused, filtering data is different from creating drop-down lists. Data filtering is added to the headers of each column, so you can filter the visible data by category – for example, filter the data in a column by month, by name, by location, etc. A drop-down list allows users to select an item to fill the cell.
Source: ZDNet.com
You May Also Like


More From Author

ServReality Brings Next-Gen Gaming Experiences to Apple Devices
January 23, 2026


The Top 25 Diamond and Pearl Pokémon
August 5, 2024


