Slack: How to better organize and share using the new Canvas feature

Slack is the de facto standard for collaboration. This platform allows you to easily communicate with your team members, share files, send direct messages, add discussion threads to your favorites, and much more.
Slack is a collaborative working tool for companies of all sizes. It provides a collaborative platform that allows your teams to communicate best in their projects.
- Downloads : 1
- Release date : 27/09/2023
- Author : Slack
- License : Free license
- Categories :
Communication – Productivity - Operating system : Android – Linux – Online service – Windows 64 bit – XP/Vista/7/8/10/11 – iOS iPhone / iPad – macOS
Recently, the company has launched a new feature called Canvas, which seems to be the missing piece of Slack’s puzzle.
Canvases are a convenient way to take notes on a project and share them with other team members (or family). So instead of having to share a document from a third-party source, you can easily create a new Canvas and share it with those who need the information. With the Canvases, you can share shopping lists, instructions, plans, project information, class schedules, chores and just about anything else you can imagine.
The Canvas can contain video and audio clips, emojis, comments, images and files. They can also use basic formats (such as bold, italic and strikethrough) as well as code samples and links.
Let me show you how to use the new Canvas feature on Slack.
How to create your first Canvas
You need a paid Slack account (this function is not available for free accounts) to use the Canvas function. The Canvases can be used both on the desktop computer and on the mobile application. I will present the functionality on the desktop application, but the process of creating and using the Canvas is the same on both platforms.
1. Open Slack
The first thing to do is to open the application Slack. Next, make sure that you are logged in to your paid account. Once logged in, you should see Canvas in the upper left corner.

The Canvas function can be accessed from the upper section of the left sidebar. Jack Wallen/ZDNET
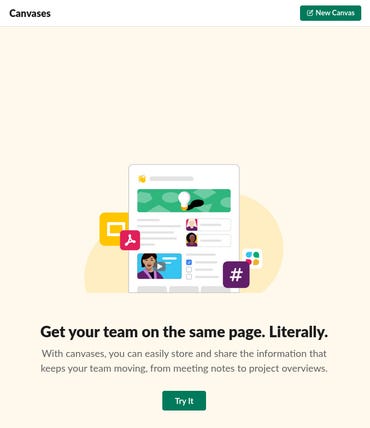
2. Open a new Canvas
After clicking on Canvas, you will see the Canvas page in Slack. To create your first canvas, click on the button that invites you to try, at the bottom of the canvas description.
You will only see this page if you have not created your first Canvas. Jack Wallen/ZDNET
3. Create your first Canvas
A new window opens, in which you can start creating your first Canvas. The first thing to do is to enter a title for the Canvas. One thing to know about creating a Canvas is that if you copy/paste text into it it will keep all the supported formats and links. One thing I quickly discovered is that the Canvases don’t support alignment. It doesn’t matter if your text is right-aligned or justified when you paste it, it will always be left-aligned.
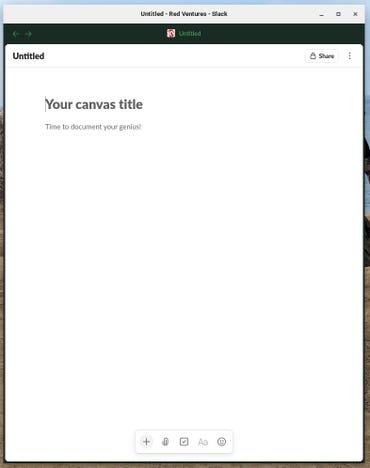
A new blank canvas is ready to be created. Jack Wallen/ZDNET
4. Add images and other elements
If you want to add an image or an audio/video clip, click on the + sign in the floating island at the bottom of the part of the Canvas where the cursor is located and, in the context menu, select the type of element you want to add.
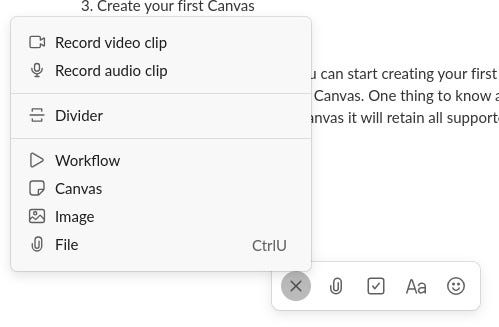
Add new elements to your Canvas from this menu. Jack Wallen/ZDNET
I found the video clips to be a very useful addition, especially if you are adding information to a Canvas that could benefit from additional explanations or a personal touch. Once you have added a video clip, you can play it in the canvas, without the need for a third-party viewer.

I added a short video to a Canvas. Jack Wallen/ZDNET
5. Interact with the elements
If you hover your cursor over an added item, you will see a small square of dots appear in the upper left corner. Click on this square to bring up a menu that offers different ways to interact with different types of elements. For example, a video clip allows you to copy the link to the item, add a comment, display it as a URL, copy the link to the video, and much more.
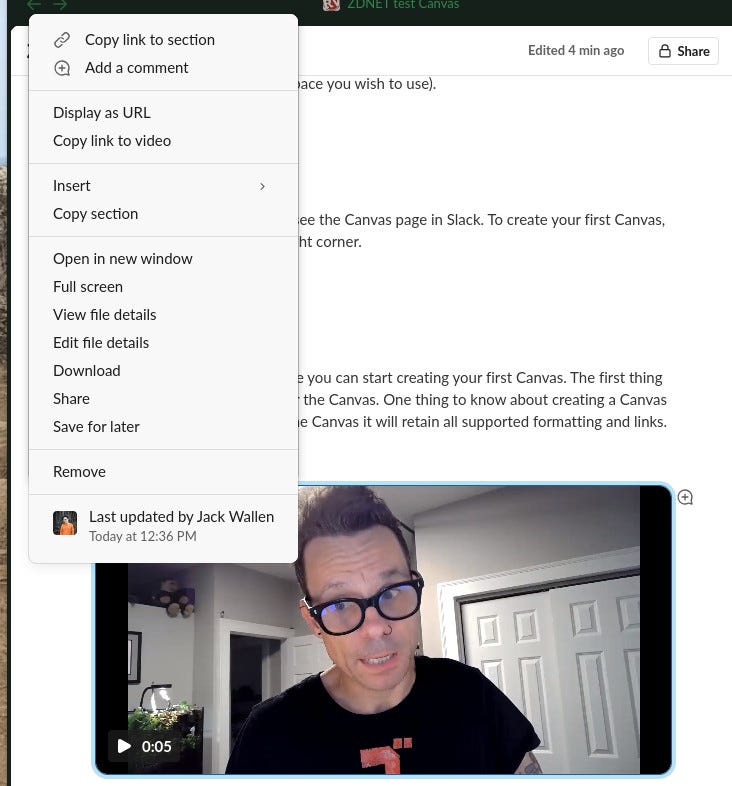
The different types of items have different entries in the context menu. Jack Wallen/ZDNET
6. Sharing a canvas
Once you have finished creating the Canvas and are ready to collaborate, click on the button Share in the upper right corner of this Canvas. A pop-up window will open in which you can select the team members to include in the share. Once you have added the necessary participants, click on Save and voila!
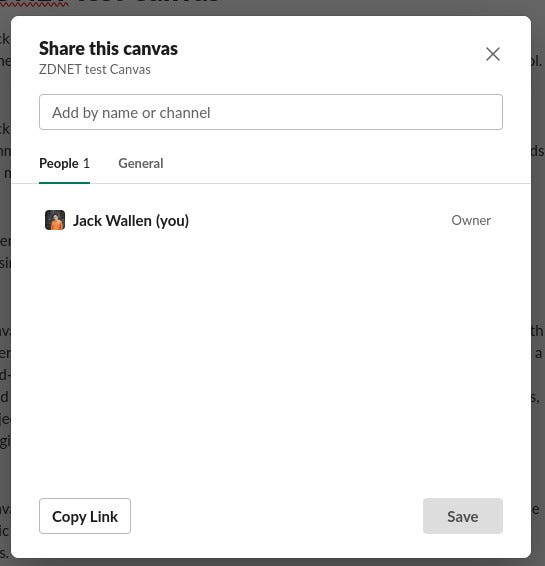
Share a Canvas with team members. Jack Wallen/ZDNET
That’s pretty much the gist of using Slack’s new Canvas feature. If you had the impression that the platform was missing an important piece, it’s a safe bet that it was this function.
Source: “ZDNet.com “
You May Also Like


More From Author

ServReality Brings Next-Gen Gaming Experiences to Apple Devices
January 23, 2026


The Top 25 Diamond and Pearl Pokémon
August 5, 2024


